Newsletter Sign Up
Subscribe to get the latest news and updates. No spam , we promise.


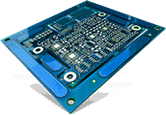
PCBs are a crucial part of most electronic and electromechanical devices, and hence need to be carefully designed, manufactured, and assembled. They enable the running of circuit in the device and have several components mounted on the board. Again, this is a crucial task and components need to be mounted in the right places and with precision. Also, with the ever shrinking size of electronic devices, PCBs need to be compact but have many components as well. This is achieved mainly through two technologies- thru-hole and surface mounting. BGA, which stands for ball grid array, is a technique used as part of the surface mounting technology. The BGA helps achieve precision and use the available board space efficiently to mount the components. Utilizing the bottom most surfaces on the board increases the interconnection in the integrated circuit. However, at times, some components need to be removed or replaced from the board. This is where the BGA rework and repair process is performed. This post elaborates on the steps involved in the BGA rework process.
There are BGA workstations, which are also called as surface mounting device (SMD) or surface mounting technology (SMT) workstations. Although most of these processes are automated or semi-automated, manual precision is required in some aspects. Primarily, there are four steps involved in the BGA rework and repair process, and there may be a few sub-steps added based on the requirements. We need to undo the steps we did during component mounting. Here a few pointers for a successful BGA rework process.
This is the first step of a BGA rework process. For safe and accurate component removal, the circuit board needs to be preheated and clamped so that it does not move. Also, localized heating of the area, from where the component needs to be removed, is an important aspect. This eases component removal as well as prevents activating good conductors of heat used in the PCB, such as copper. Proper temperature monitoring practices need to followed in this regard, which can be done manually with the help of a thermocouple or an infrared heat measuring device. On the other hand, you can even use hot air convection heating. Induce nitrogen in the area after heating. This takes away the oxygen from the site and prevents oxide layer formation. This is how the BGA component is removed.
After the component removal, the site first needs to be cooled and then cleaned. Any residue remaining in the area needs to be wiped out. In case of lead-free boards, which have now gained popularity, this process is a bit more challenging and complex. This is where temperature control is even more essential to avoid damaging the solder mask and the growth of metallic phases, and damaging the neighboring components on the board. So, the site to be cleaned needs to be positioned upward. Both airflow and heat need to be in proportion to melt the solder. The heated solder melts and reflows. This should ideally finish in one cycle of heating to prevent thermal stress on the board.
The new BGA component needs to be placed with extreme precision as removing them again would lead to wastage and increased charges. Once the site is cleaned, you need to reflow the new solder into it without damaging the other components on the board. You can place them with the help of a stencil with apertures. The solder ball slips onto the device pad. Once it fills up, any excess solder remains on the stencil. You can apply a solder paste to help the balls remain in the apertures. As in many other steps of a BGA rework process, airflow and temperature management are crucial factors in this step, too. • Re-soldering of the components to the PCB: This is the final step of the BGA rework process wherein the new BGA component is soldered onto the board. The BGA component is dipped into the solder and the board is aligned accurately for proper placement, and then soldered.
If you are an OEM and need to upgrade your PCB assembly or replace some components, do approach a reliable PCB services provider who can do the task with utmost precision. Creative-Hi-Tech Ltd. is a reliable provider of custom PCB assemblies and relevant services. They have a market presence of more than 20 years and can assist you in the BGA rework process.