Newsletter Sign Up
Subscribe to get the latest news and updates. No spam , we promise.


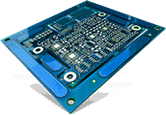
The printed circuit board (PCBs) is one integral element of almost all electronics applications. They bring life to electronic and electromechanical devices by routing signals within the circuit and enable their functioning. many people know what PCBs are but only a few know how they are manufactured. Today, PCBs are constructed using the pattern plating process. They will continue through the next phase which mainly includes etching and stripping. This post will effectively take you through various stages in the printed circuit board design process but will focus more on the etching and stripping processes of the circuit board.
Depending on the manufacturer, the PCB manufacturing process may differ slightly, especially in terms of component mounting techniques, testing methods, and so on. They are manufactured in bulk quantities using various automated machines for drilling, plating, punching, and so on. Except for some small variations, the main stages involved in the PCB manufacturing process are the same.
PCBs are made by bonding a copper layer over the entire substrate. Sometimes, both sides of the substrate are covered using copper layers. The PCB etching process, also called a controlled horizontal process, is carried out to remove excess copper from the PCB panel using a temporary mask. After the etching process, the circuit board is left with the desired copper traces. PCB etching process is done using highly aggressive ammonia-based solutions - ferric chloride or hydrochloric acid. Both the chemicals are considered economical and plentiful. To etch your PCB, you need to follow several steps as given below.
Circuit board designing is the initial stage of the etching process, using any software of your choice. Once the design is ready, get it printed on the transfer paper. Make sure that the design will fit inside the shiny side of the paper.
Now, sand the copper plate neatly, which will make its surface rough enough to hold the circuit board design. There are several things to remember while performing this step:
Even after the etching process, some amount of copper remains on the circuit board, which gets covered by tin/lead or electroplated tin. Nitric acid removes tin effectively while maintaining the copper circuit cracks below the tin metal. As a result, you will get a clear distinct copper outline on the circuit board, and the circuit board is ready to be passed on to the next process – Solder Resist.
This is one important process in the PCN designing process, which covers unsoldered areas on the circuit boards using solder resist material. As a result, it prevents the solder from forming traces, which can create shortcuts to adjacent component leads.
After the PCB is manufactured, testing becomes crucial to check the functioning and features. In this method, the PCB manufacturer determines whether the circuit board is working as expected. Today, PCBs are tested using several advanced testing equipment. ATG test machine is mainly used for testing high volume PCBs, which include flying probes and fixtureless testers.
This is the last step of PCB manufacturing which mainly includes the positioning of various electronic components on to their respective holes. This can be carried out by either through-hole technology or surface mount technology. One common aspect of both the techniques is that the leads of the component are fixed electrically as well as mechanically to the circuit board using a molten metal solder.
This is all about the manufacturing process of a PCB. If you are interested to know more about soldering tips or materials used for soldering, you can contact industry-leading manufacturers like Creative Hi-Tech. Their highly skilled and experienced experts assist you throughout the designing process.