Newsletter Sign Up
Subscribe to get the latest news and updates. No spam , we promise.


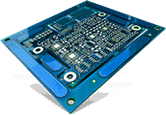
The manufacturing of 4 layered or other multilayered PCBs is a laborious process involving several steps. Each step has a great significance in determining the overall quality of the board, and hence must be executed with precision. In the last post, we had listed the first few steps involved in the production of 4 layered PCBs. As a continuation, this post describes the rest of the processes in brief.
Steps Involved in 4 layered PCB ProductionOnce the plating and copper deposition is done (described in the first post), the next involves outer layer imaging. Let’s see what happens in this process and also the other processes.
The process of photoresist is repeated here, but this time it is conducted on the outer layer of the panel. The process is performed in a sterile room to avoid any kind of contamination.
10.Plating:In this stage, copper electroplating is done on the uncovered areas of the panel from the outer layer. Underneath the copper plating, tin plating is offered to the panels to guarantee protection.
11.Stripping of Photoresist:The plating is followed by the stripping of photoresist from the panel. The photoresist stripping is done using an alkaline solution.
12.Final Etching:The undesirable copper is again removed in this stage generally using an ammoniacal etchant.
13.Tin Stripping:Now, the copper, which is present on the board is all covered with etch resist, i.e., the tin, which must be cleaned thoroughly using concentrated Nitric acid. At the end of this stage, you will get to see a clear distinct outline of copper on the PCB.
14.Solder Mask:Being one of the most important processes in board manufacturing, solder mask application must be done carefully. In this stage, an epoxy-ink is applied onto each side of the board. Once you are happy with the ink application, the next stage is the application of solder mask film over the PCB. The board is then subjected to a flash of UV light.
15. Surface Finishing:A coating is applied between a component and a bare board PCB to protect the exposed copper circuitry, while it also helps ensure a solderable surface. The following are the commonly used surface finishes.
Although the steps listed in the first and this post remain basic in the production of multilayered PCBs, it tends to change across manufacturers. However, almost all the leading names like Creative Hi-Tech follow systematic procedures as listed in their 4 layered PCB production. This helps companies to finish their PCB projects as per the specifications given without any room for confusion, ensuring on-time delivery to customers!
It is a layer of ink traces, usually white and human readable letters, applied on the component side. Silkscreening is done to identify components, test points, PCB and PCBA part numbers, warning symbols, company logos, among others.
17.Electrical Testing:The 4 layered PCB is tested for fabrication defects at every stage of manufacturing. PCB manufacturers use several methods like Bed of Nails Fixture method, Flying Probe method, In-circuit Test (ICT), functional test, X-ray inspection to detect flaws and errors in the board. PCB is considered complete with this stage.