Dec 23,2022
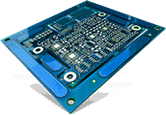
Silkscreen printing is one of the crucial parts of printed circuit board design and manufacturing. However, if you are new to the PCB designing and fabrication field, you may need to get introduced to the importance of this printing process. It is a layer of ink trace that gives textual, human-readable information on PCB components, circuit points, logos, symbols, marks, and so on. This printing helps engineers and manufacturers locate and identify different PCB parts easily and also any warning signs, thus eliminating the chances of possible errors and mishaps. This post discusses each step involved in silkscreen PCB printing in detail. So, stay tuned.
A Step-by-Step Guide to Silkscreen PCB Printing
Popularly known as nomenclature, silkscreen is used in different phases of circuit board manufacturing and assembly. It is used during the placement of the components. The process of silkscreen PCB printing is categorized into the following areas. However, this process and the steps involved may vary slightly depending on factors such as quality, materials used, cost, and more.
-
Silkscreen Design: This is the first step involved in silkscreen PCB printing. Preparing an appropriate silkscreen design is of utmost importance to achieve reliable finished products. It will be beneficial if the silkscreen design is prepared using Computer-aided Design (CAD) software. This software allows designers to seamlessly connect schematics, component placements, routing, and more. Once you finish the silkscreen's required menu, you can easily go with the design.
-
Board Preparation: Diagram implementation comes next after the CAD blueprint is completed. It is essential to follow the right sequence to finish a high-quality product. Selection of the board for production is the first step involved. Once done, the selected material is picked up for cleaning, followed by board handling and tape trolling. Next, it’s time to print the prepared board on transparent paper. Make sure the design paper should not move from its actual position. The entire setup is turned downwards and then covered with dark cardboard. The lower part is exposed to ultraviolet light for at least 10 to 15 minutes to develop the design completely.
-
Silkscreen Printing: This is the step where actual silkscreen printing on the board occurs. You should follow the below-listed steps.
-
-
Fix the etched circuit board underneath the silkscreen fabric.
-
Check the proper alignment of the board so that it does not move during the process.
-
Apply the silkscreen UV curable ink evenly on the artwork.
-
Dry the circuit board using a drying oven.
-
Handling and Inspection Procedures: Once silkscreen printing is done, the circuit board is sent for handling and inspection procedures for quality check. This procedure ensures that text-based information is readable to human eyes.
-
Silkscreen Treatment: This is the final step of silkscreen PCB printing. The silkscreen print should be appropriately treated to ensure it is set for use.
Silkscreen printing is a straightforward process. However, it needs to be executed properly to avoid possible errors. Readability and quality are of utmost importance with the increasing demand for complex circuit boards. Thus, it is always recommended to get
silkscreen PCB printing done from highly experienced and reliable players like Creative Hi-Tech. The company has a highly skilled and experienced team of experts in all three forms of silk-screening application methods. They can also assist you in selecting the appropriate silk-screening method after analyzing the specifications and requirements.
Related Blog Post:
PCB Plating: Purpose, Types, and Methods Discussed
PCB Legend Text: A Few Important Things to Keep in Mind During PCB Legend Designing